
If you’re after that fresh-faced glow without the fuss of complicated skincare routines, then hydrafacial at home might just be your new best friend. This treatment combines cleansing, exfoliation, extraction, and hydration in a single session, making it a favourite for many. With the right steps and products, you can achieve salon-quality results right in your own bathroom. Let’s explore how to get the most out of your hydrafacial experience at home.
Key Takeaways
- Hydrafacial is a multi-step treatment that cleanses, exfoliates, and hydrates your skin.
- You can achieve professional results at home with the right tools and products.
- Preparation is key; ensure your skin is ready for the treatment.
- Post-treatment care is essential to maintain the glow and health of your skin.
- Hydrafacial can be tailored to suit all skin types and concerns.
Understanding Hydrafacial Treatments
What Is Hydrafacial?
Okay, so what is a Hydrafacial? Basically, it’s a multi-step facial treatment that’s designed to rejuvenate and improve your skin. Unlike old-school facials, which can be a bit rough with manual extractions, Hydrafacial uses fancy tech to be gentler but more effective. It’s a non-invasive facial treatment that people love because it gives pretty instant results and boosts your skin’s overall health.
It combines cleansing, exfoliation, extraction, hydration, and antioxidant protection all in one go. The magic happens with a special device that uses Vortex-Fusion technology. This creates a vortex effect (sounds cool, right?) to get rid of impurities while pumping your skin full of nourishing serums.
How Does Hydrafacial Work?
The Hydrafacial process is like a well-choreographed dance for your face. It’s a multi-step treatment to cleanse, exfoliate, extract, hydrate, and protect. Here’s the breakdown:
- Cleansing and Exfoliation: A special serum is applied to remove dead skin cells and excess sebum. The device gently cleans and exfoliates without causing irritation.
- Acid Peel: Next, a gentle acid peel is applied to loosen debris and dirt from pores. This prepares the skin for extraction.
- Extraction: The device uses powerful suction to painlessly remove blackheads and impurities from your pores. It’s way less ouchy than manual extractions.
- Hydration: Now for the good stuff! Your skin is infused with hydrating and antioxidant-rich serums, tailored to your skin’s needs. These serums boost hydration, elasticity, and radiance.
- LED Light Therapy (Optional): Some places offer LED light therapy as part of the Hydrafacial. This can stimulate collagen production, reduce inflammation, and improve overall skin health.
The Hydrafacial device’s spiral design and suction power allow for painless extractions, effectively removing debris from pores. Following the extraction process, the skin is infused with hydrating and antioxidant-rich serums tailored to address individual skin concerns.
Who Can Benefit from Hydrafacial?
Loads of people can benefit from Hydrafacial! It’s not just for one skin type. If you’re looking to improve your skin’s texture, minimise fine lines, or just give your skin a good refresh, Hydrafacial could be a good shout. It’s also great if you’ve got congested pores, blackheads, or uneven skin tone. Basically, anyone wanting a quick and effective skin boost can benefit. Here’s a quick list:
- People wanting to improve skin texture and appearance
- Individuals with congested pores and blackheads
- People seeking to minimise fine lines and wrinkles
- Individuals with hyperpigmentation or uneven skin tone
- Those in need of a quick and effective skin refreshment
The Science Behind Hydrafacial
Key Ingredients in Hydrafacial
Okay, so what actually goes into a Hydrafacial? It’s not just water, I can tell you that much! The magic lies in the serums used at each stage. These are packed with goodies designed to cleanse, exfoliate, hydrate, and protect. Think of it as a super-charged cocktail for your face.
- Hyaluronic Acid: This is a hydration hero. It attracts and holds moisture, plumping up the skin and reducing the appearance of fine lines. Basically, it’s like giving your skin a big drink of water.
- Antioxidants: These fight free radicals, which are nasty little things that damage skin cells and cause premature ageing. Common antioxidants include Vitamin C and Vitamin E.
- Peptides: These are like messengers that tell your skin to produce more collagen. Collagen is what keeps your skin firm and elastic, so peptides are essential for a youthful complexion.
- Salicylic and Glycolic Acids: These are exfoliating acids that help to remove dead skin cells and unclog pores. They’re often used in the cleansing and peeling stages of the Hydrafacial.
The specific ingredients can vary depending on the Hydrafacial clinic and the type of treatment you’re getting. Some clinics might add extra ingredients to target specific skin concerns, like acne or hyperpigmentation. It’s always worth asking what’s in the serums before you start.
The Role of Vortex Technology
So, the ingredients are important, but the way they’re delivered is just as crucial. That’s where the vortex technology comes in. The Hydrafacial machine uses a special handpiece with a spiral design. This creates a vortex effect, which is like a mini-tornado on your face. This Hydrafacial treatment does a few things:
- Exfoliates: The vortex action gently removes dead skin cells and debris from the surface of your skin.
- Extracts: The suction power of the vortex helps to unclog pores and remove blackheads and whiteheads.
- Infuses: The vortex also helps to push the serums deep into your skin, ensuring maximum absorption.
The vortex technology is what makes Hydrafacial so effective. It allows for a deeper cleanse and better serum penetration than traditional facial treatments. Plus, it’s relatively painless, which is always a bonus!
Benefits of Hydration for Skin Health
We all know that drinking water is good for our health, but did you know that hydration is also essential for healthy skin? When your skin is properly hydrated, it looks and feels better. Here’s why:
- Improved Elasticity: Hydrated skin is more elastic, which means it’s less likely to wrinkle or sag.
- Reduced Fine Lines: When your skin is plumped with moisture, fine lines become less visible.
- Brighter Complexion: Hydration helps to improve blood flow to the skin, giving you a healthy glow.
- Better Barrier Function: Hydrated skin has a stronger barrier function, which means it’s better able to protect itself from environmental damage.
| Benefit | Description |
|---|---|
| Increased Radiance | Hydrated skin reflects light better, giving you a more radiant complexion. |
| Reduced Sensitivity | Well-hydrated skin is less prone to irritation and sensitivity. |
So, by focusing on hydration, Hydrafacial helps to improve the overall health and appearance of your skin. It’s not just about getting a quick fix; it’s about investing in long-term skin health. And who doesn’t want that?
Preparing for Your Hydrafacial at Home

Alright, so you’re thinking of giving yourself a hydrafacial at home? Awesome! But before you jump right in, a little prep work can make a huge difference. Trust me, a bit of planning goes a long way in getting that radiant glow you’re after. Let’s get you sorted.
Essential Tools and Products
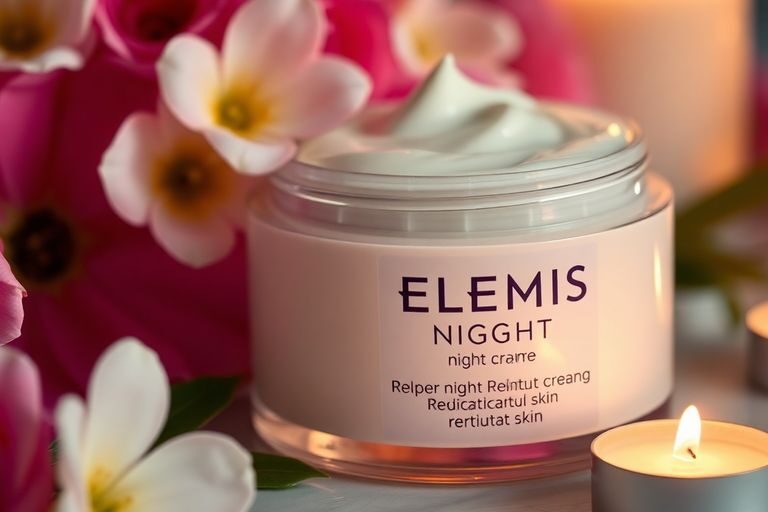
Okay, first things first, you’ll need to gather your supplies. Think of it like prepping for a cooking show – you wouldn’t start without all your ingredients, right? Here’s a list to get you started:
- Cleanser: A gentle, non-abrasive cleanser to start with a clean slate.
- Exfoliating Solution: This could be a mild chemical peel (like lactic or glycolic acid) or an enzyme-based exfoliator. Don’t go too strong, especially if you’re new to this.
- Hydrating Serum: Look for ingredients like hyaluronic acid, which is a hydration superstar.
- Facial Steamer (Optional): This can help open up your pores, but a warm towel works too.
- Soft Cloths or Sponges: For gentle cleansing and application.
- A Good Moisturiser: To lock in all that lovely hydration afterwards.
- Sunscreen: Absolutely crucial, even if you’re staying indoors. Sun protection is key!
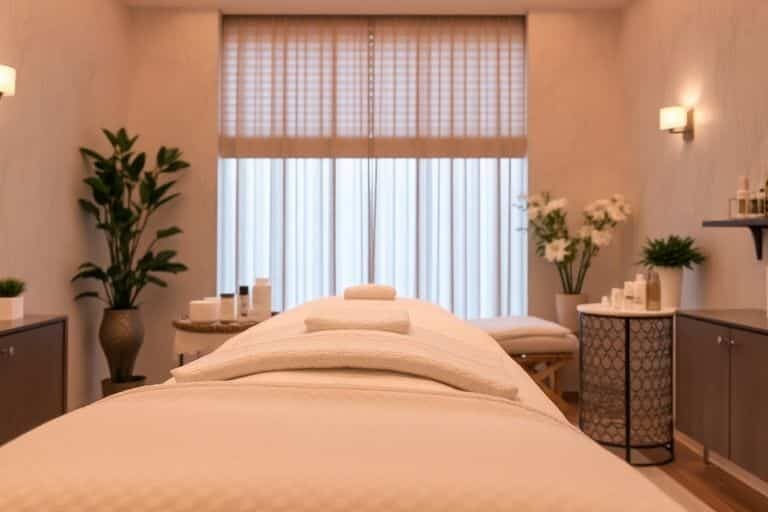
Creating a Relaxing Environment
Now, let’s set the mood. This isn’t just about skincare; it’s about self-care! Think spa day, even if it’s just in your bathroom. Dim the lights, light a candle (if you’re into that), and put on some relaxing music. The goal is to create a calm and peaceful atmosphere where you can unwind and enjoy the process. Turn off your phone, tell the family you need some ‘me time’, and make it an experience. A relaxed mind equals relaxed skin, or so they say!
Skin Preparation Steps
Before you even think about touching that exfoliating solution, you need to prep your skin. This is super important to avoid irritation and get the best results. Here’s what I do:
- Cleanse: Start with a gentle cleanser to remove any makeup, dirt, and oil. Make sure you rinse thoroughly.
- Steam (Optional): If you have a facial steamer, use it for about 5-10 minutes to open up your pores. If not, a warm towel pressed gently against your face works just as well.
- Patch Test: This is non-negotiable! Before applying any new product to your entire face, test it on a small area (like behind your ear or on your inner arm) to check for any adverse reactions. Wait 24 hours before proceeding. Better safe than sorry, right?
Preparing your skin properly is like laying the foundation for a house. If the foundation isn’t solid, the rest of the structure won’t be either. So, take your time, be gentle, and listen to your skin. It’ll thank you for it!
Step-by-Step Guide to Hydrafacial at Home

Alright, let’s get down to the nitty-gritty. I’m going to walk you through how I do my hydrafacial at home. It’s not quite the same as the salon experience, but it’s a great way to keep my skin looking fresh between professional treatments. Plus, it’s way more budget-friendly!
Cleansing Your Skin
First things first, you need a clean canvas. I always start with a double cleanse. This is super important to remove any makeup, dirt, and oil that’s built up during the day.
- Oil-based cleanser: This breaks down makeup and sebum without stripping your skin.
- Gentle cleanser: Follow up with a water-based cleanser to remove any residue from the oil cleanser.
- Pat dry: Use a soft towel to gently pat your skin dry. Don’t rub!
Exfoliation Techniques
Exfoliation is key to getting that smooth, radiant glow. It removes dead skin cells, allowing your serums to penetrate better. I like to switch between a physical and chemical exfoliant, depending on how my skin is feeling. You can create a spa-like ambiance at home for a facial by following these steps.
- Physical exfoliant: A gentle scrub with fine granules. Be careful not to scrub too hard!
- Chemical exfoliant: I love using a mild AHA or BHA peel. These acids dissolve the bonds between dead skin cells, revealing brighter skin.
- Enzyme peel: A gentler option for sensitive skin. These use fruit enzymes to exfoliate.
Remember, don’t over-exfoliate! Once or twice a week is usually enough. Overdoing it can irritate your skin and cause breakouts.
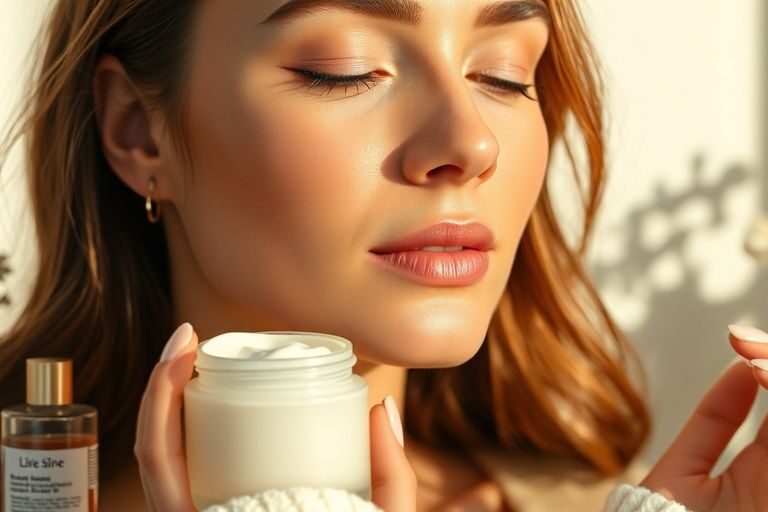
Infusing Serums Effectively
This is where the magic happens! After exfoliating, your skin is ready to soak up all the goodness from your serums. I like to use a combination of hydrating, antioxidant, and brightening serums. The key is to apply them in the right order, from thinnest to thickest consistency.
- Hydrating serum: Hyaluronic acid is my go-to. It draws moisture into the skin, leaving it plump and dewy.
- Antioxidant serum: Vitamin C is a powerhouse ingredient that protects against free radical damage and brightens the skin.
- Specialty serums: Depending on my skin’s needs, I might use a serum with niacinamide to reduce redness and pore size, or a peptide serum to boost collagen production.
I use a facial massage tool to help the serums absorb better. It also feels amazing and helps to relax my facial muscles. You can also use your fingertips to gently massage the serums into your skin using upward, circular motions.
Aftercare for Optimal Results
So, you’ve treated yourself to an at-home Hydrafacial – fantastic! Now, it’s time to make sure you get the absolute best results. Proper aftercare is key to maintaining that radiant glow and ensuring your skin stays happy and healthy. Let’s dive into what you need to do.
Hydration and Moisturisation
Hydration, both inside and out, is absolutely vital after a Hydrafacial. Your skin has just been treated to a deep cleanse and exfoliation, so it’s primed to absorb moisture.
- Drink plenty of water throughout the day. Aim for at least 8 glasses. I find carrying a reusable water bottle helps me keep track.
- Apply a hydrating serum containing hyaluronic acid. This ingredient is a moisture magnet!
- Follow up with a rich, but non-comedogenic moisturiser to lock in all that goodness.
Think of your skin like a sponge. After a good clean, it’s ready to soak up all the hydration you can give it. Don’t skimp on the moisturiser – it’s your skin’s best friend right now.
Sun Protection Tips
Sun protection is always important, but it’s even more crucial after a Hydrafacial. Your skin is more sensitive to UV rays, so you need to be extra diligent. I always make sure to apply broad-spectrum sunscreen every morning.
- Use a sunscreen with an SPF of at least 30.
- Apply it liberally, about a shot glass full for your entire body.
- Reapply every two hours, especially if you’re outdoors.
- Even on cloudy days, UV rays can still penetrate, so don’t skip the sunscreen!
Avoiding Common Mistakes
It’s easy to make a few slip-ups after your Hydrafacial, but avoiding these common mistakes will help you maintain your results and prevent irritation. I’ve definitely been guilty of a few of these myself!
- Avoid harsh exfoliants for at least a week. Your skin has already been exfoliated, so give it a break.
- Skip products containing retinol or strong acids for a few days. These can be too irritating right after treatment.
- Don’t pick at your skin! I know it’s tempting, but it can lead to breakouts and scarring.
- Avoid hot environments like saunas or steam rooms for 24-48 hours. The heat can cause inflammation.
- Hold off on heavy makeup for the rest of the day to allow your skin to breathe and fully absorb the benefits of the treatment. Opt for gentle skincare instead.
Incorporating Hydrafacial into Your Routine
Frequency of Treatments
Okay, so you’ve had your first at-home Hydrafacial and you’re loving the results. The big question is: how often should you be doing this? It really depends on your skin type and what you’re hoping to achieve. For most people, I’d suggest starting with once a fortnight. See how your skin reacts. If you’ve got oily or acne-prone skin, you might benefit from doing it a little more often, maybe once a week. If your skin is on the drier or more sensitive side, stick to once a fortnight or even once a month. Listen to your skin; it’ll tell you what it needs. Regular HydraFacial treatments can really help maintain that initial glow.
Complementary Skincare Products
Your at-home Hydrafacial is a great boost, but it’s not a complete replacement for your regular skincare routine. Think of it as a supercharged addition. Here’s what I recommend:
- Gentle Cleanser: Keep using a mild cleanser to wash your face daily. Avoid anything too harsh that will strip your skin.
- Hydrating Serum: A hyaluronic acid serum is your best friend. Apply it after your Hydrafacial and every day to keep your skin plump and hydrated.
- Moisturiser: Lock in all that goodness with a good moisturiser. Choose one that suits your skin type.
- Sunscreen: Non-negotiable! Protect your skin from sun damage every single day, rain or shine.
It’s important to avoid using harsh exfoliants or retinoids in the days leading up to and following your Hydrafacial. These can irritate your skin and undo all the good work you’ve just done.
Long-Term Skin Health Strategies
An at-home Hydrafacial is a fantastic tool, but it’s just one piece of the puzzle when it comes to long-term skin health. Here are some other things I swear by:
- Stay Hydrated: Drink plenty of water throughout the day. It makes a huge difference to your skin’s appearance.
- Eat a Balanced Diet: Load up on fruits, vegetables, and healthy fats. What you eat really does show on your skin.
- Get Enough Sleep: Aim for 7-8 hours of sleep each night. Your skin repairs itself while you sleep.
- Manage Stress: Stress can wreak havoc on your skin. Find healthy ways to manage stress, like exercise, yoga, or meditation.
Consistency is key when it comes to skincare. Don’t expect miracles overnight. Stick to your routine, be patient, and you’ll see results over time.
Common Concerns and Solutions
Let’s be real, even with the best prep and technique, things can sometimes go a bit sideways with at-home Hydrafacials. I’ve been there, trust me! So, let’s tackle some common issues and how to sort them out.
Addressing Skin Sensitivities
Okay, so your skin’s a bit red and angry after your Hydrafacial? Don’t panic! It happens. First things first, cool it down with a cold compress.
- Ditch any harsh actives: Step away from the retinol and strong acids for a few days.
- Keep it simple: Focus on gentle, fragrance-free moisturisers to soothe and repair your skin barrier.
- Patch test is key: Before trying any new serum, always do a patch test on a small area of your skin to check for reactions.
If the redness persists or gets worse, or if you experience any swelling or itching, it’s time to call a dermatologist. Seriously, don’t mess around with potential allergic reactions.
Managing Breakouts Post-Treatment
Ugh, the dreaded post-facial breakout. It’s annoying, but it doesn’t necessarily mean you did anything wrong. Sometimes, Hydrafacials can bring underlying congestion to the surface. Here’s how to handle it:
- Resist the urge to pick: I know it’s tempting, but picking will only make things worse and can lead to scarring.
- Spot treat: Use a gentle spot treatment with salicylic acid or benzoyl peroxide on individual blemishes.
- Keep cleansing: Continue with your regular gentle cleansing routine to keep the area clean.
Understanding Results Timeline
So, you did your Hydrafacial, and you’re staring in the mirror wondering why you don’t look like a supermodel yet? Patience, my friend! Results aren’t always instant. Here’s a realistic timeline:
- Immediate glow: You should notice some immediate improvements, like smoother, more hydrated skin.
- Short-term (days): Expect a reduction in dullness and a more even skin tone. Hydrafacial treatments can help with this.
- Long-term (weeks): With regular treatments, you’ll see improvements in fine lines, wrinkles, and overall skin health.
Don’t expect miracles overnight. Consistency is key, and everyone’s skin is different. If you’re not seeing the results you hoped for after a few treatments, consider tweaking your technique or trying different serums. And remember, a healthy lifestyle (sleep, diet, hydration) plays a massive role in your skin’s appearance too!
Many people have worries when it comes to skincare, and that’s completely normal. Whether it’s about finding the right products or dealing with skin issues, we’re here to help. If you have questions or need advice, don’t hesitate to visit our website for more information and support. Let’s tackle those skincare concerns together!
Final Thoughts on Your Hydrafacial Journey
So there you have it! With the right approach, you can easily bring the benefits of a Hydrafacial into your own home. Remember, it’s all about consistency and care. Stick to gentle products, keep your skin hydrated, and don’t forget your sunscreen. This isn’t just a one-off treatment; it’s about building a routine that keeps your skin looking fresh and vibrant. Embrace the journey to healthier skin and enjoy the glow that comes with it. You’ve got this!
Frequently Asked Questions
What is a Hydrafacial?
A Hydrafacial is a special skin treatment that cleans, exfoliates, and hydrates your skin all in one go. It’s a gentle way to improve your skin’s look and feel.
How does a Hydrafacial work?
During a Hydrafacial, a machine is used to cleanse your skin, remove dead skin cells, and infuse it with nourishing serums. This process helps to make your skin look fresh and bright.
Who can benefit from a Hydrafacial?
Hydrafacials are suitable for everyone, no matter your skin type or age. Whether you have dry, oily, or sensitive skin, this treatment can help improve your skin’s health.
How often should I get a Hydrafacial?
It’s generally recommended to have a Hydrafacial once a month. This regular treatment can help keep your skin looking its best.
What should I do after my Hydrafacial?
After your Hydrafacial, make sure to drink plenty of water, use a gentle cleanser, and apply sunscreen daily to protect your skin.
Can I do a Hydrafacial at home?
Yes, you can do a simplified version of a Hydrafacial at home using similar products and tools. Just follow the steps carefully to achieve good results.


